Node.js Profiling
JavaScript Chats Hack Session 2 Spring 2021
April 10, 2021
In the previous JS Chats on optimization, we took a peek at the Chrome DevTools and how we can use the Performance tools to profile our web application loading time. Since both Node.js and Chromium both rely on the V8 engine and adhere to the Chrome DevTools protocol, the DevTools in Chrome can actually be a debugger and a profiler for Node.js as well! Let's see how we can use it.
Here, we built a very simple sever program, with one API endpoint to get some cryptocurrency prices.
app.get('/coin-prices', async (req, res) => {
    const listOfCoins = ['dogecoin', 'bitcoin', 'ethereum', 'polkadot',
        'litecoin', 'cardano', 'bitcoin-cash', 'stellar', 'chainlink',
        'binancecoin'];

    const prices = {};
    for (const coinId of listOfCoins) {
        prices[coinId] = await getCoinPrice(coinId);
    }
    res.json(prices);
});
The full server program can be found here:
https://github.com/uclaacm/js-chats-s21/tree/main/node-profile
The endpoint uses a list of coin IDs, queries their prices against an external
API getCoinPrice, and return them as a JSON object. For those who has worked
with async programming in JavaScript before, you might have already noticed the
bad performance pattern. If not, don't worry. We will show where the bad spot
is and how to optimize it. Let's try to profile this.
To allow for profiling, we invoke the server program with the --inspect flag.
node --inspect index.jsThe terminal outputs the following
Debugger listening on ws://127.0.0.1:9229/9b78b923-925f-462c-8dca-345b3b6f9f38
For help, see: https://nodejs.org/en/docs/inspector
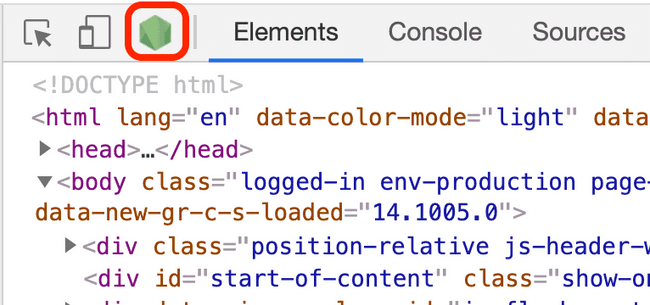
This means the profiler and debugger has been invoked. Now, we head to Chrome and open DevTools (right click anywhere and click inspect). On the top left corner, a Node.js icon is going to pop up.
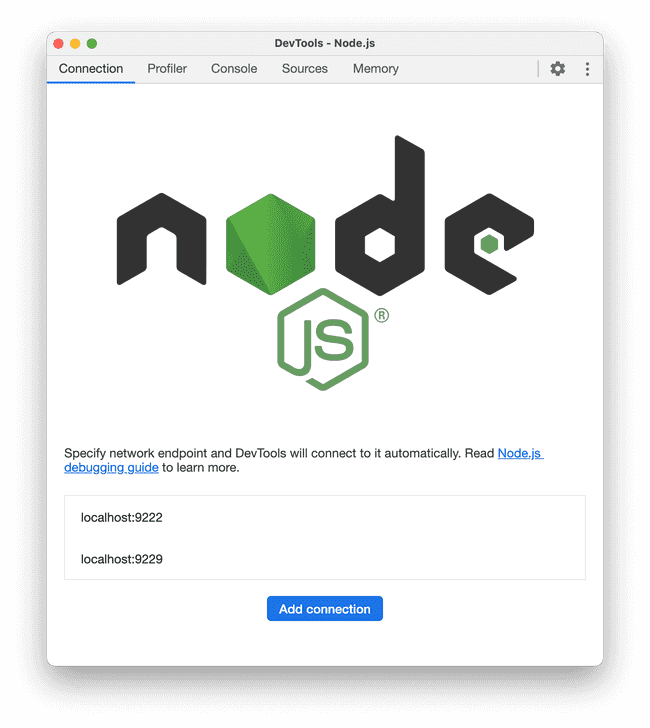
After we click on it, the Node.js profiler will pop up.
The tabs are:
- Connection: choosing which Node.js instance to connect to
- Profiler: capture and inspect CPU profile for Node.js instance
- Console: look at output from
console.logfrom the Node.js instance - Sources: the debugger interface
- Memory: capture memory snapshot
We will focus on the Profiler tab.
Profiling Node.js
We have one endpoint and let's take a look at its performance. The steps we are going to take for profiling are:
- Start the profiling
- Send a request to our app
- End the profiling
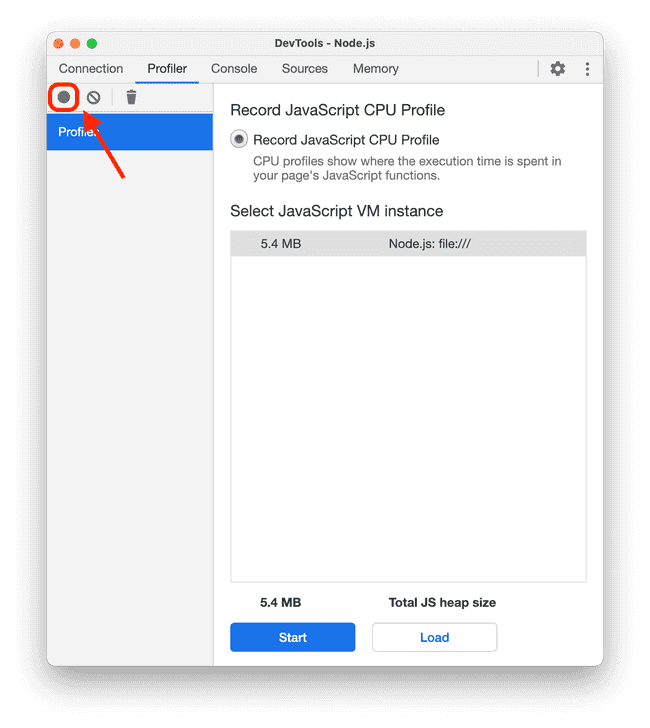
To start the profiling, we click the "record" button on the top left.
Then, we need to send a request to our server. You can do it in whatever ways: the browser, Postman, curl… I am just going to use curl here:
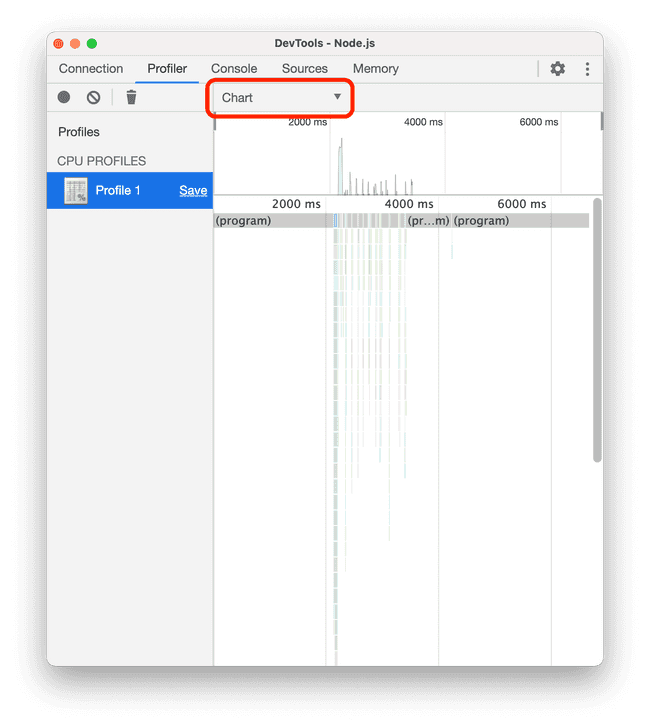
curl localhost:3001/coin-pricesAfter we get our response back, we stop the profiling by hitting the record button again. Then, a profile will have been captured. To see a visualization of the call stack, select the "Chart" option from the top selector.
They way you interpret this is the same as how you would interpret the timeline for profiling our web application. Notice how our program exhibit peaks in the call stack! This is indicative of the performance issue with our API. Our request took almost 2000 ms to finish (the distance from the first peak to the last peak), which is pretty slow for a simple endpoint.
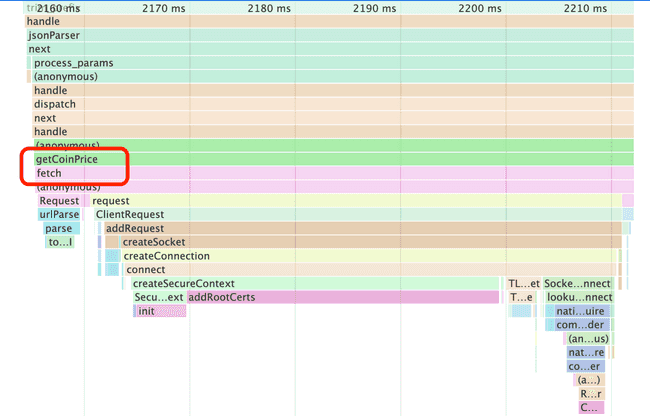
If we zoom into one of the peak, we realize that our server is handling one of our API calls!
Tip: you can use Ctrl+F or ⌘F to search for a named function in the call stack.
The culprit here is the serial handling of our request to get the prices of the cryptocurrencies. The for loop awaits for one API call to be done before making the next one!
for (const coinId of listOfCoins) {
    prices[coinId] = await getCoinPrice(coinId);
    // wait for it to be done, before we can start the next one
}
This is a waste of time. We could have started all the request at once, and collect the result all together.
const prices = {};
await Promise.all(listOfCoins.map(async id => {
    prices[id] = await getCoinPrice(id);
}));
Let me explain the code. For each of the coin ID, we call an async function
on it. The function takes the coin ID and get its price to put it in the
prices object. You might ask, isn't this still calling await in a loop?
Not exactly. Imagine how map calls the function:
// imaginary `map` function
function map(func) {
    const results = [];
    for (const item of this) {
        results.push(func(item));
    }
    return results;
}
map does not await for the given func. Remember that async function
returns a Promise. map iterates through the list of coin IDs, kicks off one
async function call for each coin, and collects each Promise returned from the
async function. Therefore, the output of map is an array of Promises.
Using Promise.all, we turn the array of Promises into one single Promise,
which only resolves when all the Promises in the array are resolved, i.e.,
all the API calls are finished.
With the new piece of code, we are making the requests for the prices all at once so they run in parallel.
After the optimization, we take another profile snapshot.
The distance between the first peak and the last peak dropped to under 400 ms. That's a 5× speed-up!
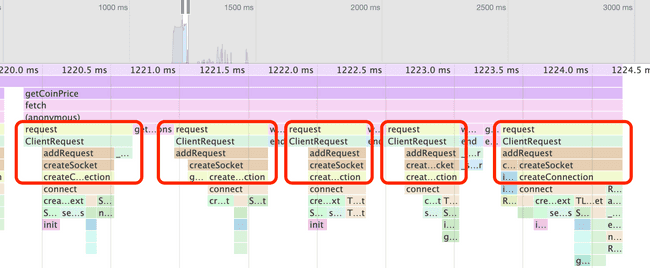
If we take a close look at the first peak of the call stack, we can see that there are multiple request being sent back to back, meaning that the requests are fired together.
In the real world, optimization is not just looking for loops with await in
them. It is more complex than this. However, knowing how to profile and seeing
how CPUs are consumed in your application definitely helps you in optimizing
the application.
The complete implementation of the optimized program can be found in the following repository:
https://github.com/uclaacm/js-chats-s21/tree/main/node-profile
